
저장을 습관화
NestJS - Swagger를 사용해서 API 문서 만들기 본문
NestJS 공식 문서 swagger 관련
https://docs.nestjs.com/openapi/introduction
Documentation | NestJS - A progressive Node.js framework
Nest is a framework for building efficient, scalable Node.js server-side applications. It uses progressive JavaScript, is built with TypeScript and combines elements of OOP (Object Oriented Programming), FP (Functional Programming), and FRP (Functional Rea
docs.nestjs.com
Swagger 패키지 설치
$ npm install @nestjs/swagger

added 3 packages, and audited 760 packages in 3s
main.ts 파일 설정
import { NestFactory } from '@nestjs/core';
import { AppModule } from './app.module';
import { HttpExceptionFilter } from './common/exceptions/http-exception.filter';
import { ValidationPipe } from '@nestjs/common';
import { DocumentBuilder, OpenAPIObject, SwaggerModule } from '@nestjs/swagger';
// 위 @nestjs/swagger의 라이브러리를 import함

async function bootstrap() {
  const app = await NestFactory.create(AppModule);
  app.useGlobalPipes(new ValidationPipe()); // class validator 사용을 위함
  app.useGlobalFilters(new HttpExceptionFilter());

// 아래 부분을 추가해줌
  const config = new DocumentBuilder()
    .setTitle('Swagger Test')
    .setDescription('Hello!')
    .setVersion('1.0.0')
    .build();

  const document: OpenAPIObject = SwaggerModule.createDocument(app, config);
  SwaggerModule.setup('docs', app, document); // 여기 docs가 URI가 됨
// 위 부분을 추가해줌

  const PORT = process.env.PORT;
  await app.listen(PORT);
}
bootstrap();
이렇게 작성하면 자동적으로 main.ts -> AppModule(app.module.ts) imports 내용 확인, CatsModule(cats.module.ts)확인
-> cats.module.ts controllers 확인, CatsController(cats.controller.ts) 확인 -> API 목록 확인 후 문서 생성이 진행된다.
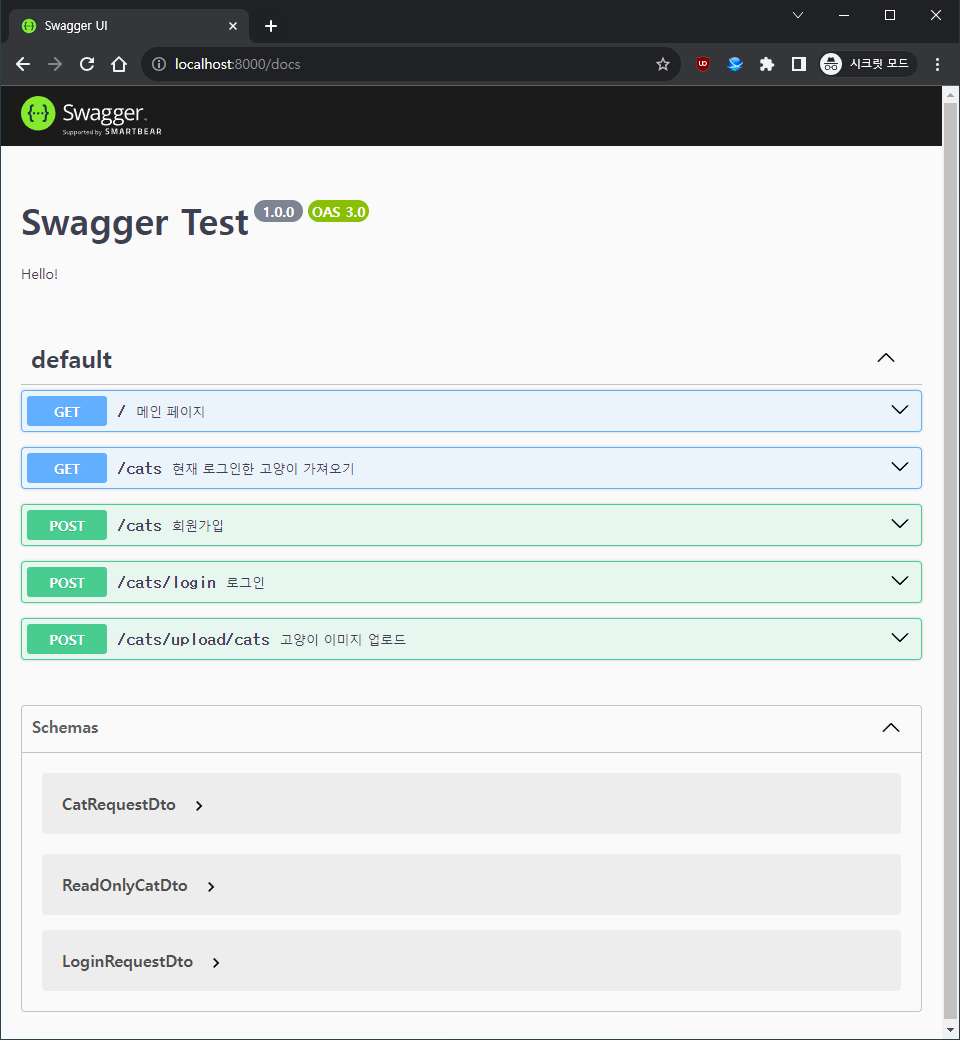
이후 localhost:8000/docs 에 접속하면
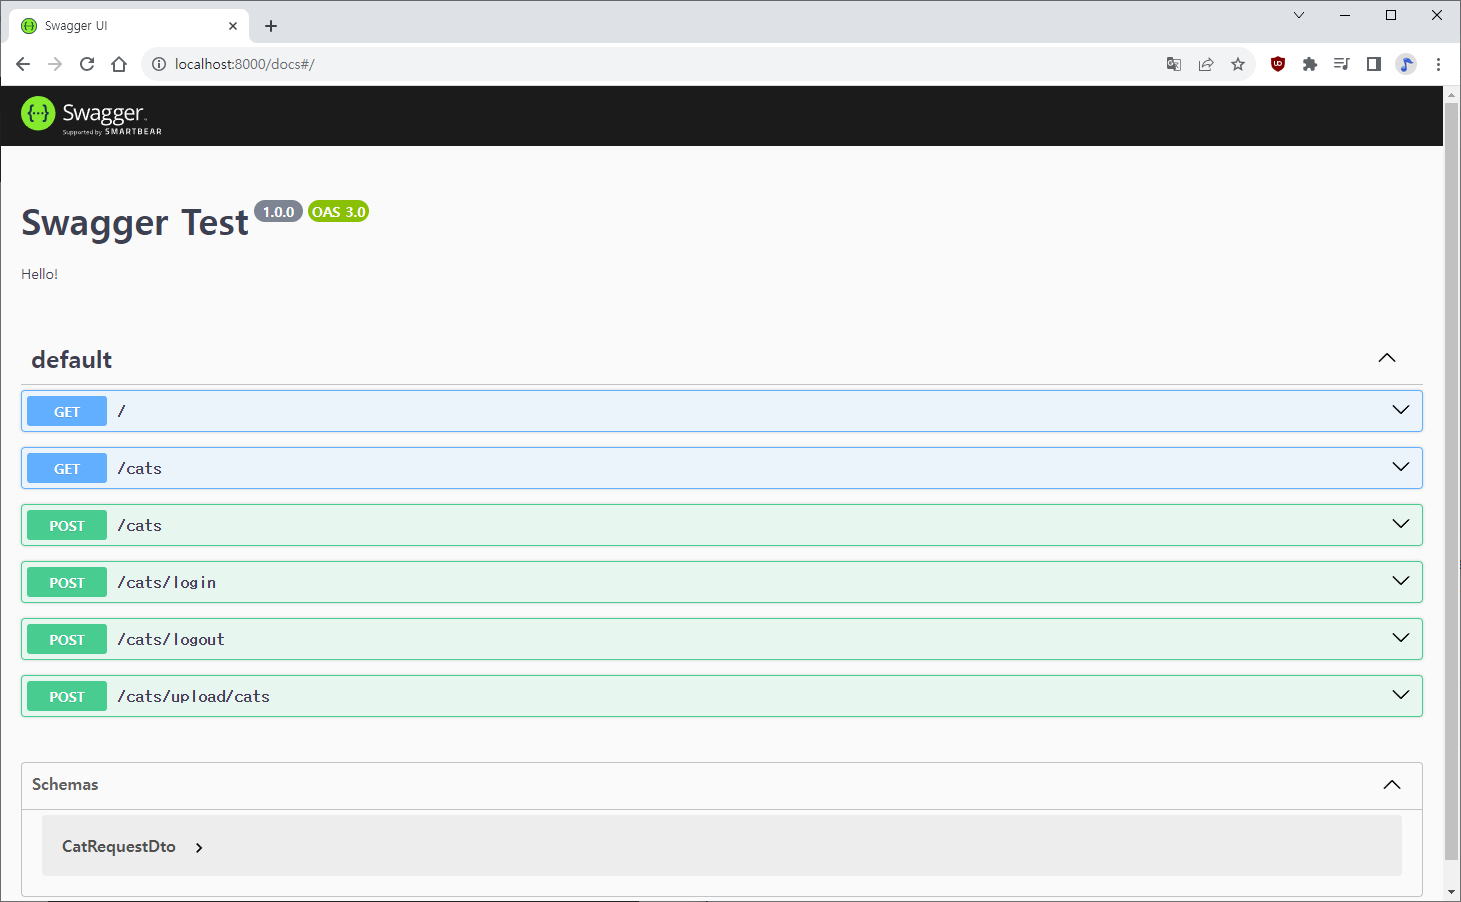
지금까지 작성한 API의 문서가 완성되었음을 확인할 수 있다.
이로써 일일이 노션에 직접 입력해줄 필요가 없게 되었다
다만 이 상태로는 백엔드 개발자 외에는 swagger 문서를 보고도 어떤 API인지 이해하기 어려울 수 있으니
추가 내용을 달아주도록 한다
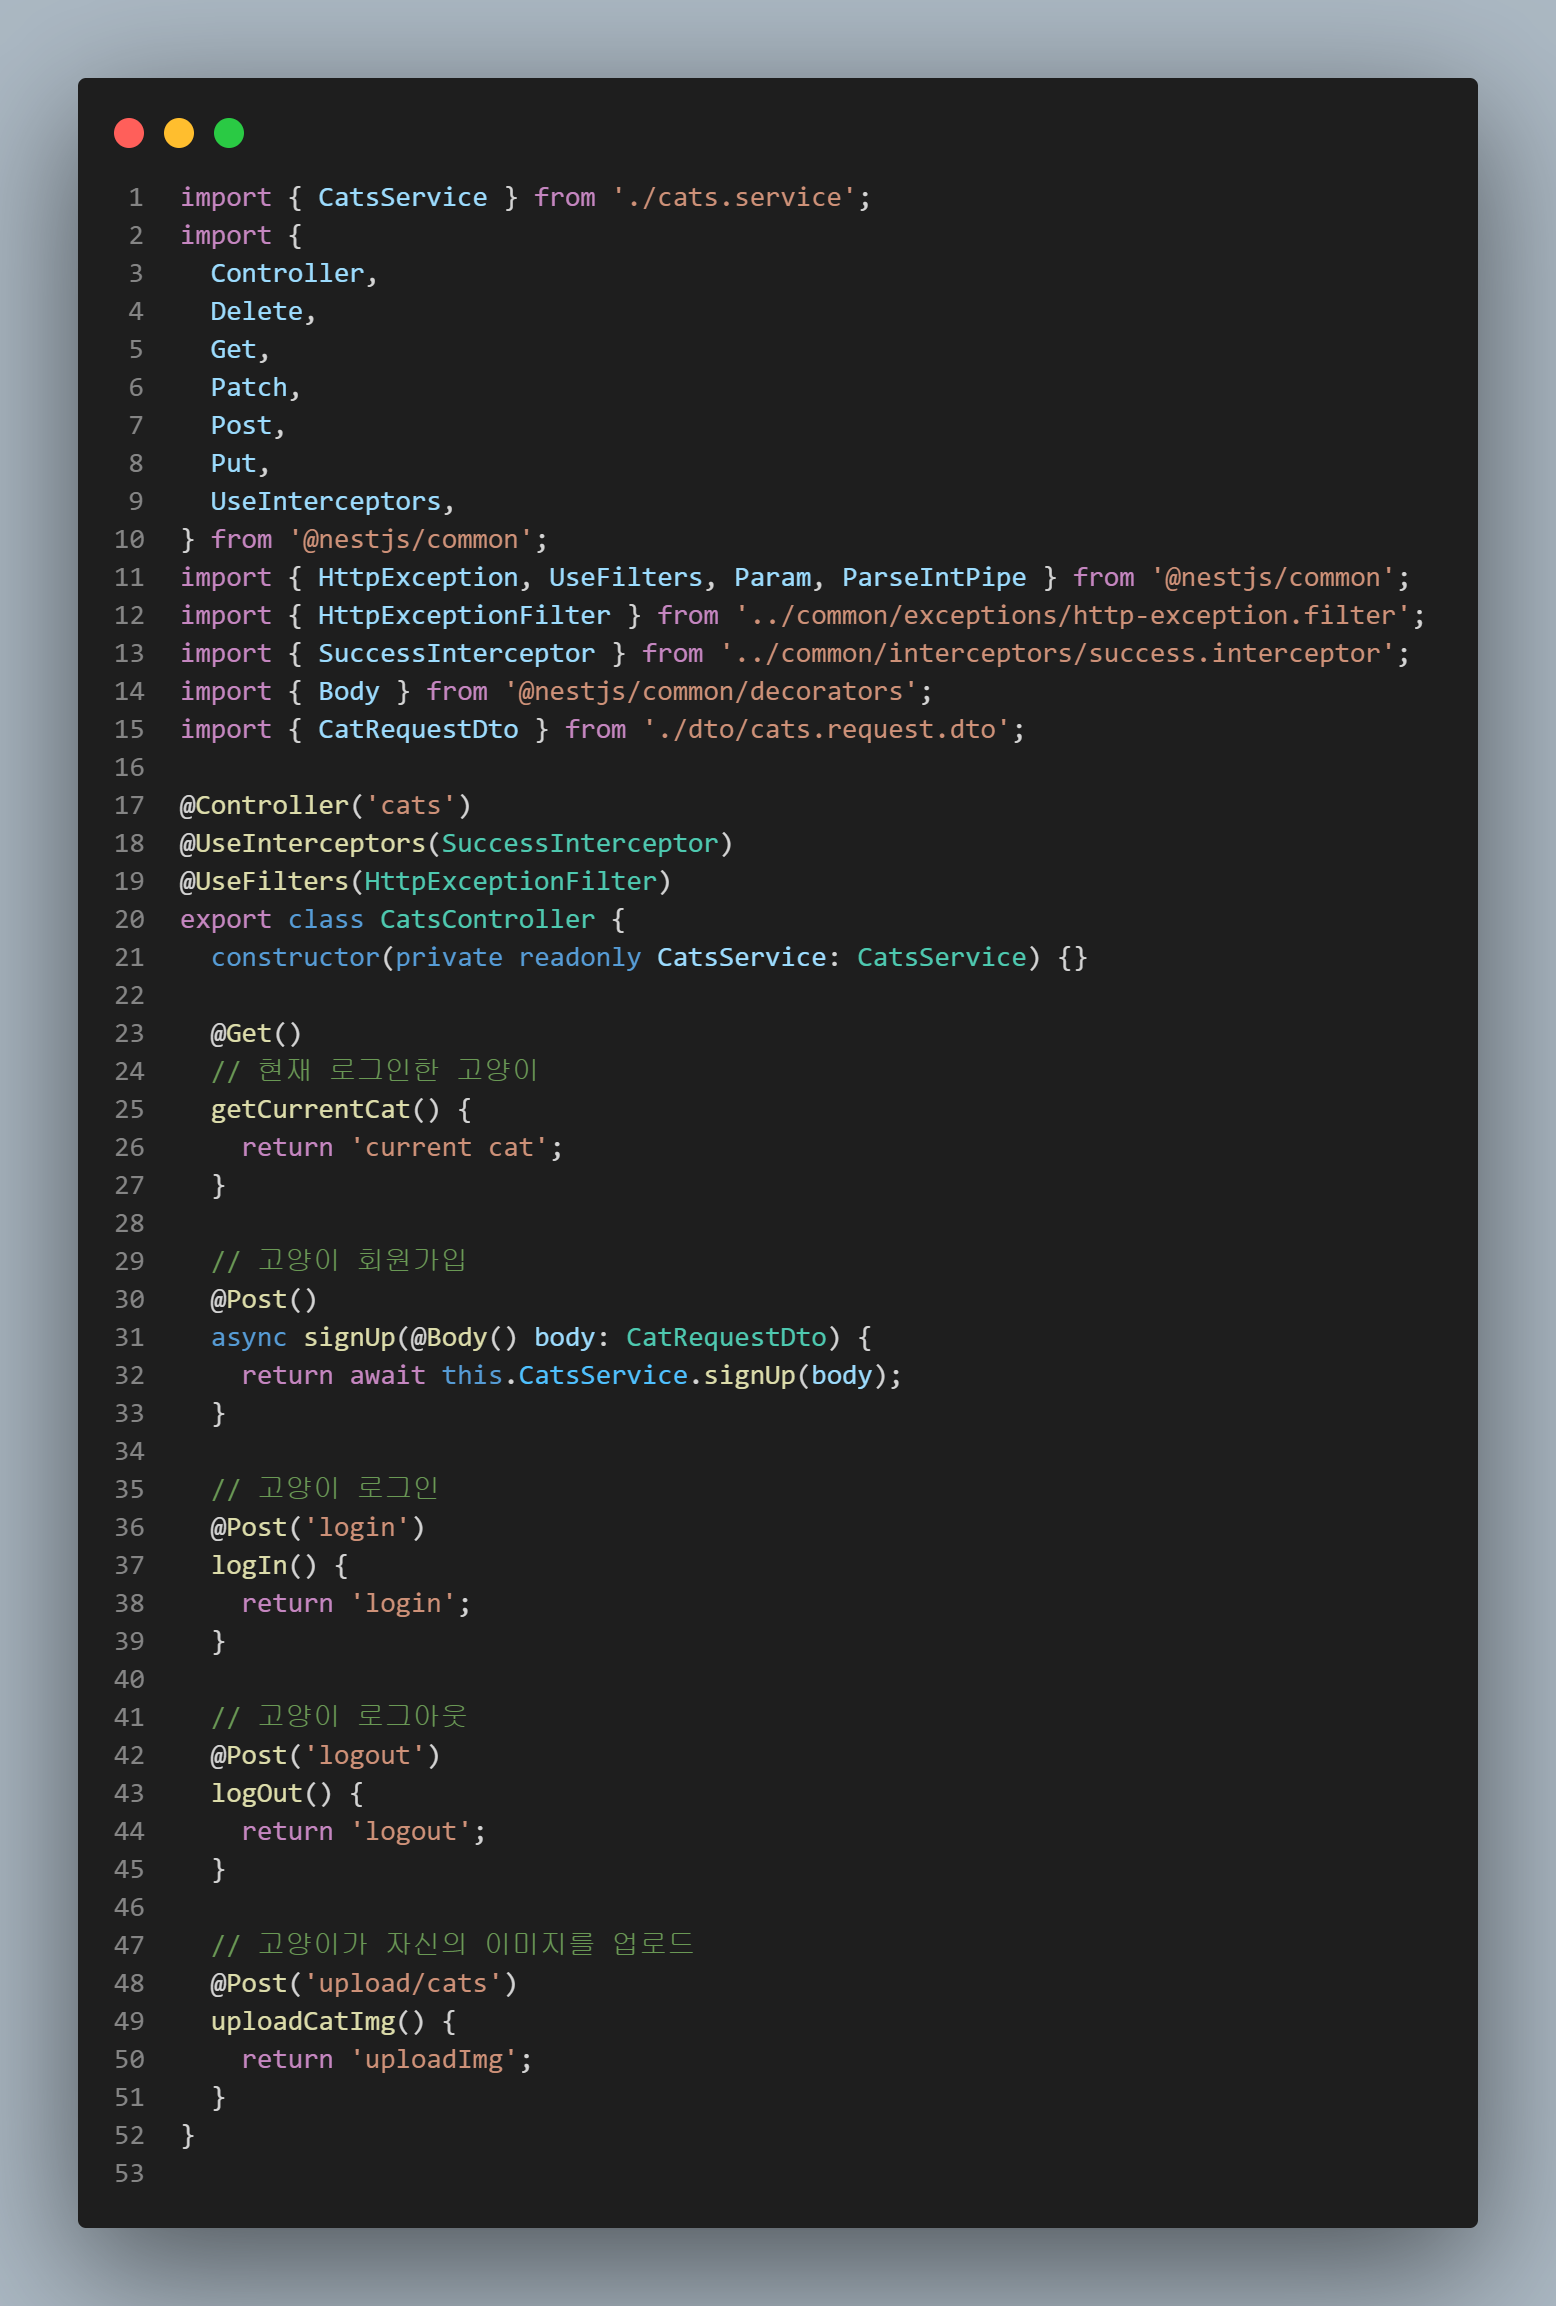
@nest/js/swagger 패키지에서 ApiOperation 라이브러리를 가져와
각 API에 @ApiOperation({summary:"(내용)"}) 을 달아주도록 한다
// 생략
import { ApiOperation } from '@nestjs/swagger';

@Controller('cats')
@UseInterceptors(SuccessInterceptor)
@UseFilters(HttpExceptionFilter)
export class CatsController {
  constructor(private readonly CatsService: CatsService) {}

  // 현재 로그인한 고양이
  @ApiOperation({ summary: '현재 로그인한 고양이 가져오기' })
  @Get()
  getCurrentCat() {
    return 'current cat';
  }

  // 고양이 회원가입
  @ApiOperation({ summary: '회원가입' })
  @Post()
  async signUp(@Body() body: CatRequestDto) {
    return await this.CatsService.signUp(body);
  }

  // 고양이 로그인
  @ApiOperation({ summary: '로그인' })
  @Post('login')
  logIn() {
    return 'login';
  }

  // 고양이 로그아웃
  @ApiOperation({ summary: '로그아웃' })
  @Post('logout')
  logOut() {
    return 'logout';
  }

  // 고양이가 자신의 이미지를 업로드
  @ApiOperation({ summary: '고양이 이미지 업로드' })
  @Post('upload/cats')
  uploadCatImg() {
    return 'uploadImg';
  }
}
이 다음 swagger 페이지를 새로고침하면

각 API에 대한 설명이 달려있는 것을 확인할 수 있다.
또한 이 상태에서도 postman이나 Thunder client처럼 API를 실행해 볼 수 있는데
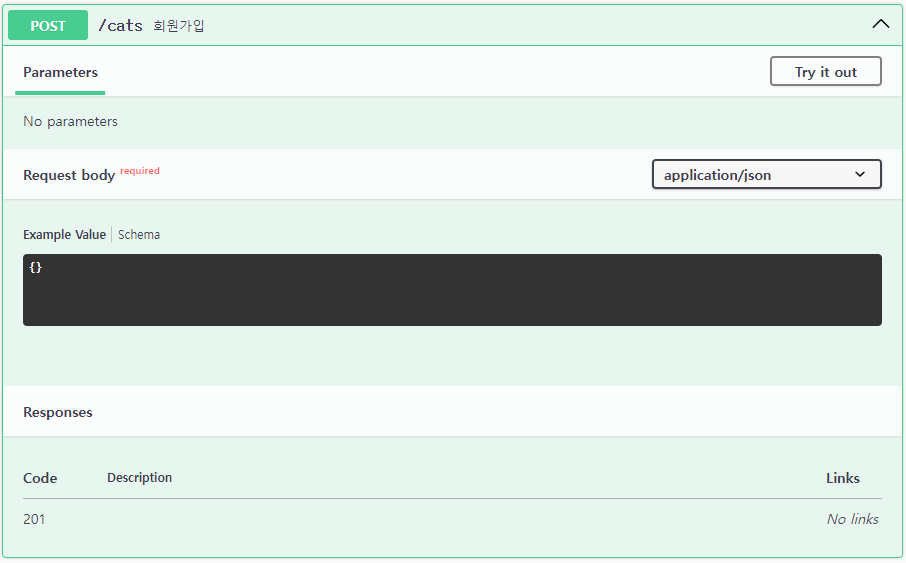
위 화면에서 Try it out을 클릭하면 요청과 함께 보낼 body 데이터를 입력할 수 있다.
하지만 지금 상황에선 어떤 내용을 입력해야할지 알수 없으므로 주석을 달아주도록 하자
- cats.request.dto.ts
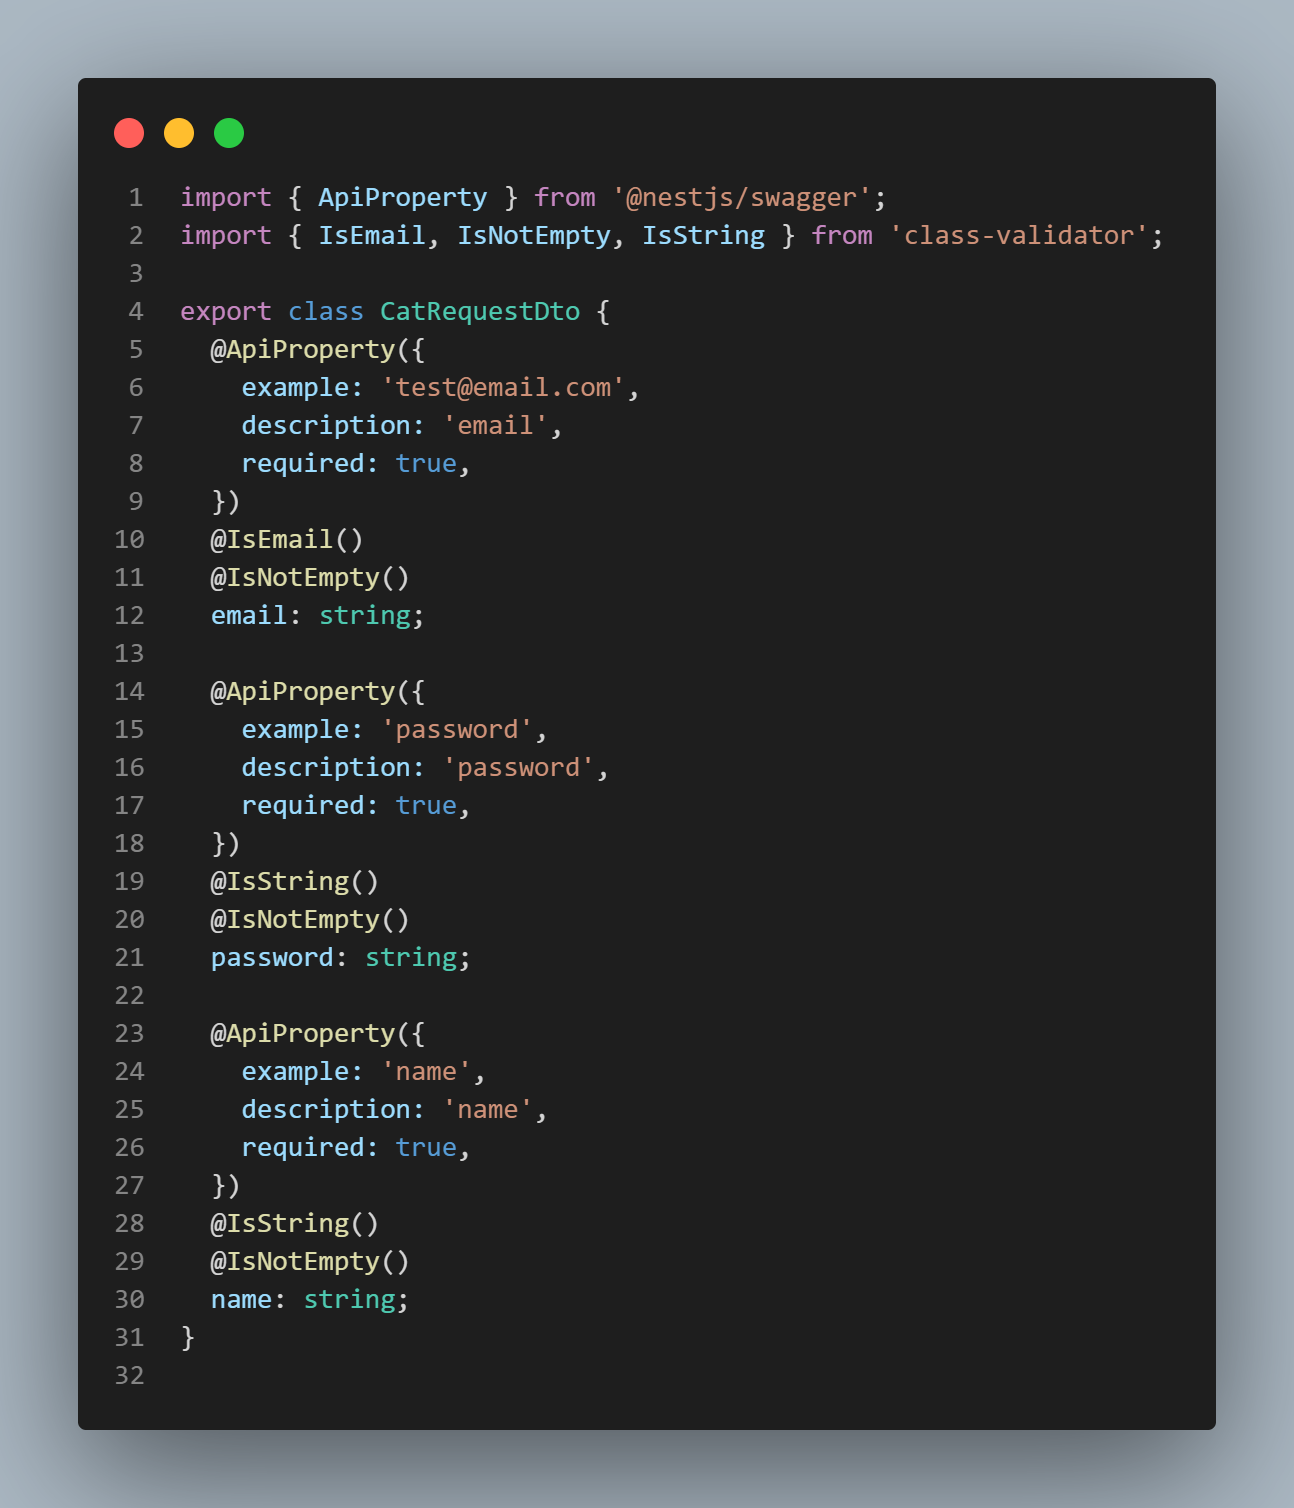
DTO 파일에서 각 항목에 ApiProperty를 이용해 사용자에게 보여줄 내용을 입력하고
- cats.controller.ts
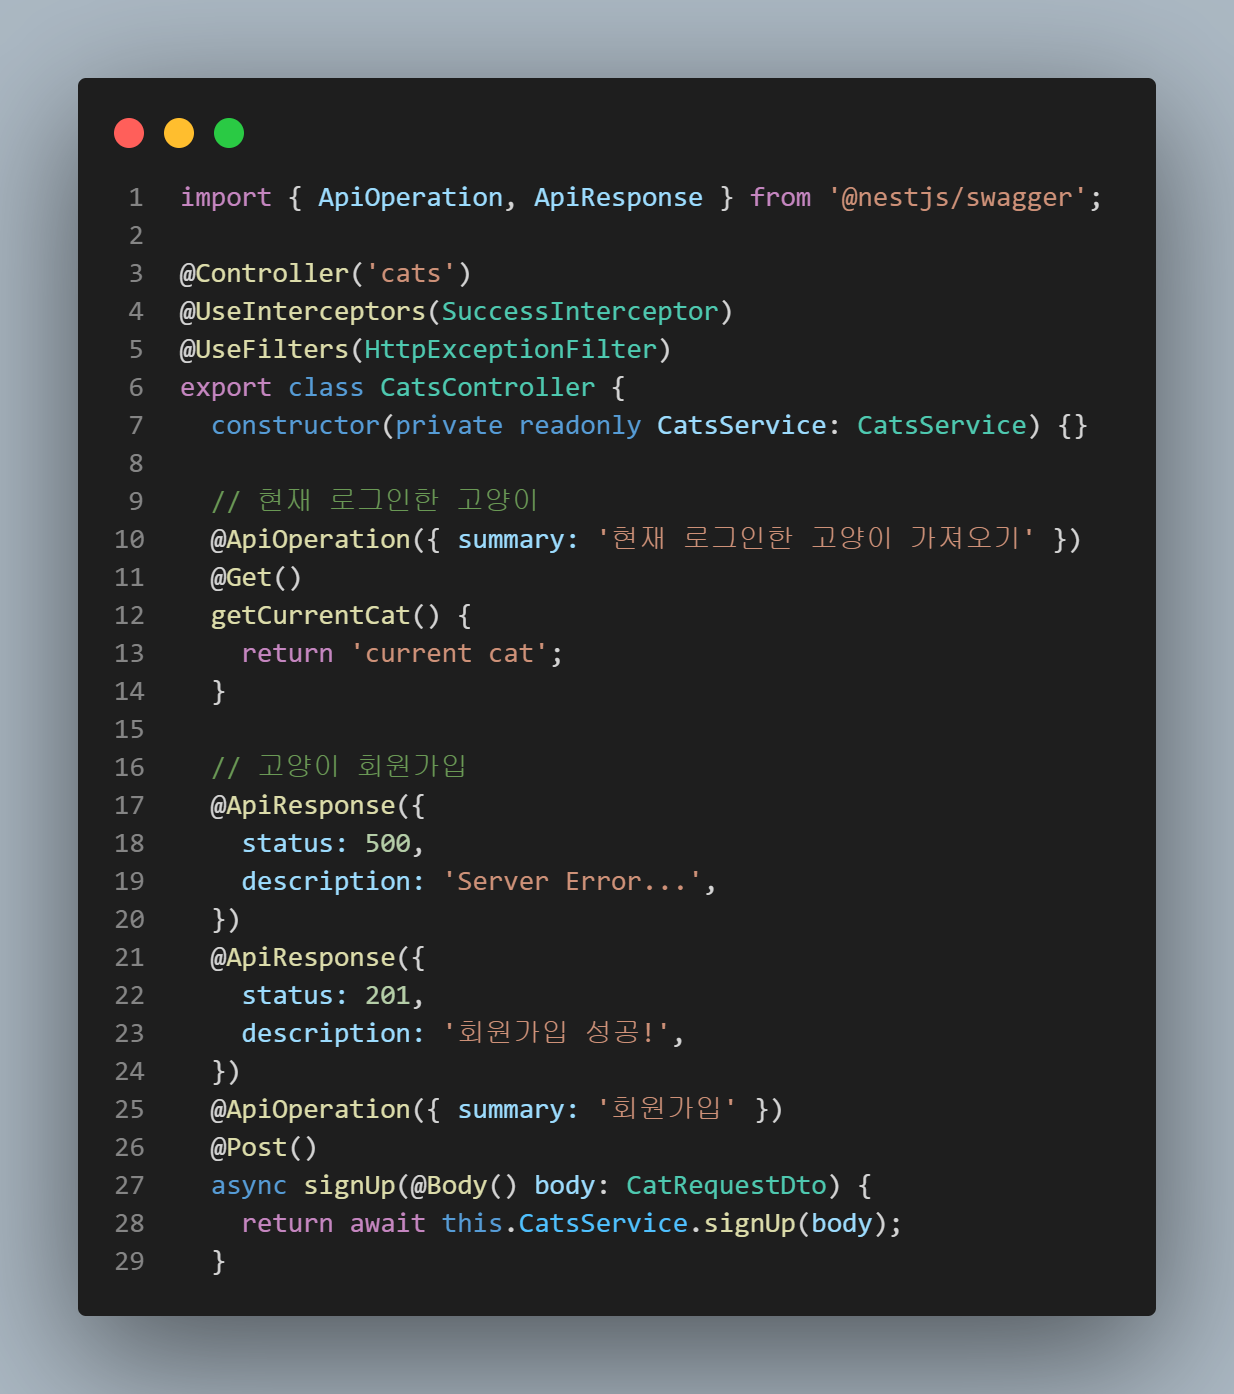
컨트롤러 파일에서 @ApiResonse를 이용해 성공과 실패의 에러 코드, 메세지를 지정해주면
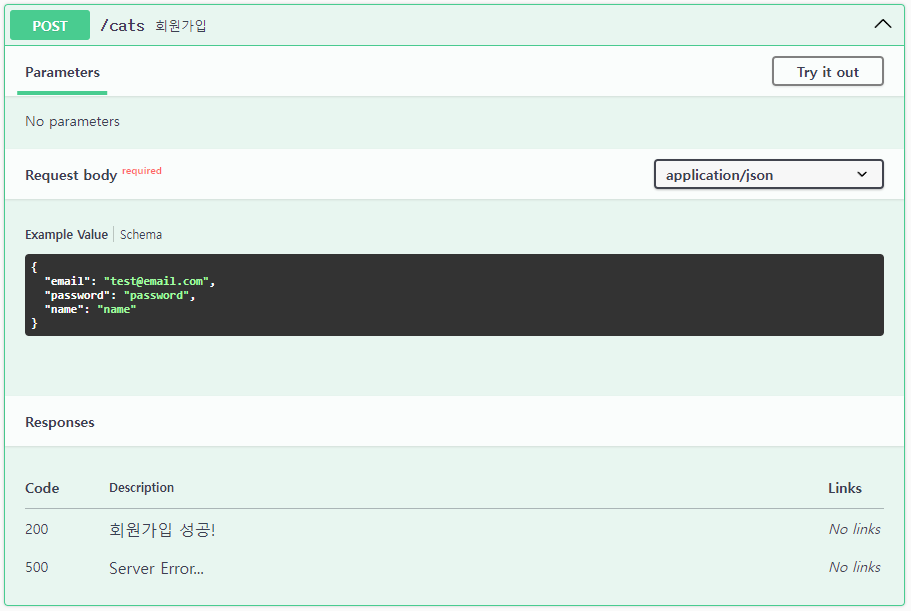
Example Value의 내용이 위와 같이 채워지고 Responses의 내용이 생겼음을 확인할 수 있다.
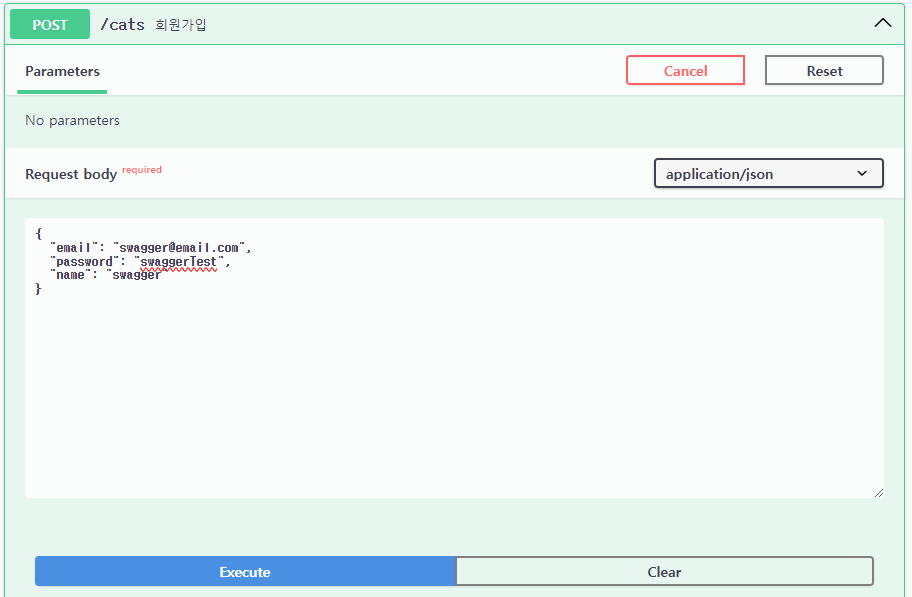
이제 테스트 데이터를 보내보면
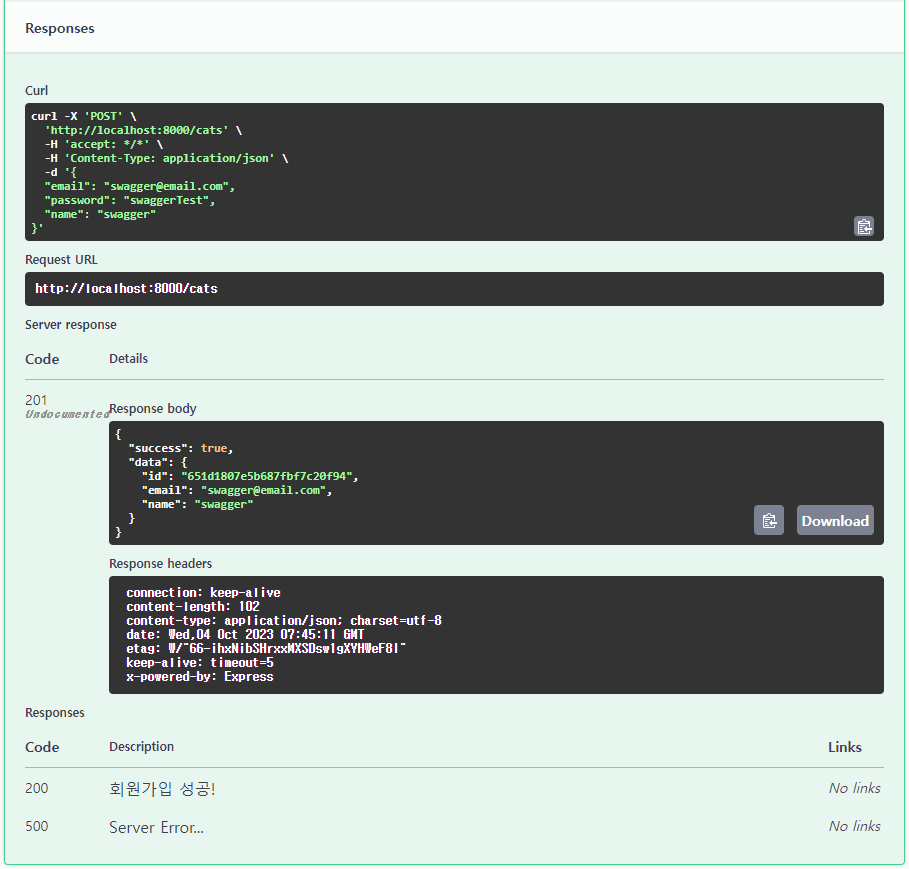
이번 테스트에서는 성공 코드가 201을 응답받았다
컨트롤러 파일에서 회원가입 성공 코드를 200에서 201로 수정해야겠다
이 데이터는 실제 DB에 저장되니 유의하도록 하자

추가
swagger에 확인할 수 있는 API 사용법이 관계자 외 외부인에게 노출될 경우 보안상 큰 문제가 될 수 있다.
이를 막기 위해서 express-basic-auth를 사용하자
https://www.npmjs.com/package/express-basic-auth
express-basic-auth
Plug & play basic auth middleware for express. Latest version: 1.2.1, last published: 2 years ago. Start using express-basic-auth in your project by running `npm i express-basic-auth`. There are 384 other projects in the npm registry using express-basic-au
www.npmjs.com
설치
$ npm install express-basic-auth
본래 express-basic-auth는 express를 위해 개발되었으나,
nest.js가 express 위에서 돌아가므로, express-basic-auth 또한 nest.js 위에서 사용 가능하다.
- .env
// 아래 내용 추가, 사용자 계정와 패스워드는 임의로 작성하였다.
SWAGGER_USER=BackEndAdmin
SWAGGER_PASSWORD=SwaggerTest
- main.ts 내용 추가
// ...생략...
import * as expressBasicAuth from 'express-basic-auth';

async function bootstrap() {
// ...생략...
  app.use(
    ['/docs', '/docs-json'],
    expressBasicAuth({
      challenge: true,
      users: {
        [process.env.SWAGGER_USER]: process.env.SWAGGER_PASSWORD,
      },
    }),
  );

  // swagger 웹 생성 부분보다 앞에 와야한다.

  const config = new DocumentBuilder()
    .setTitle('Swagger Test')
    .setDescription('Hello!')
    .setVersion('1.0.0')
    .build();

  const document: OpenAPIObject = SwaggerModule.createDocument(app, config);
  SwaggerModule.setup('docs', app, document);
// ...생략...
}
bootstrap();
이후 swagger 웹에 접속해보면
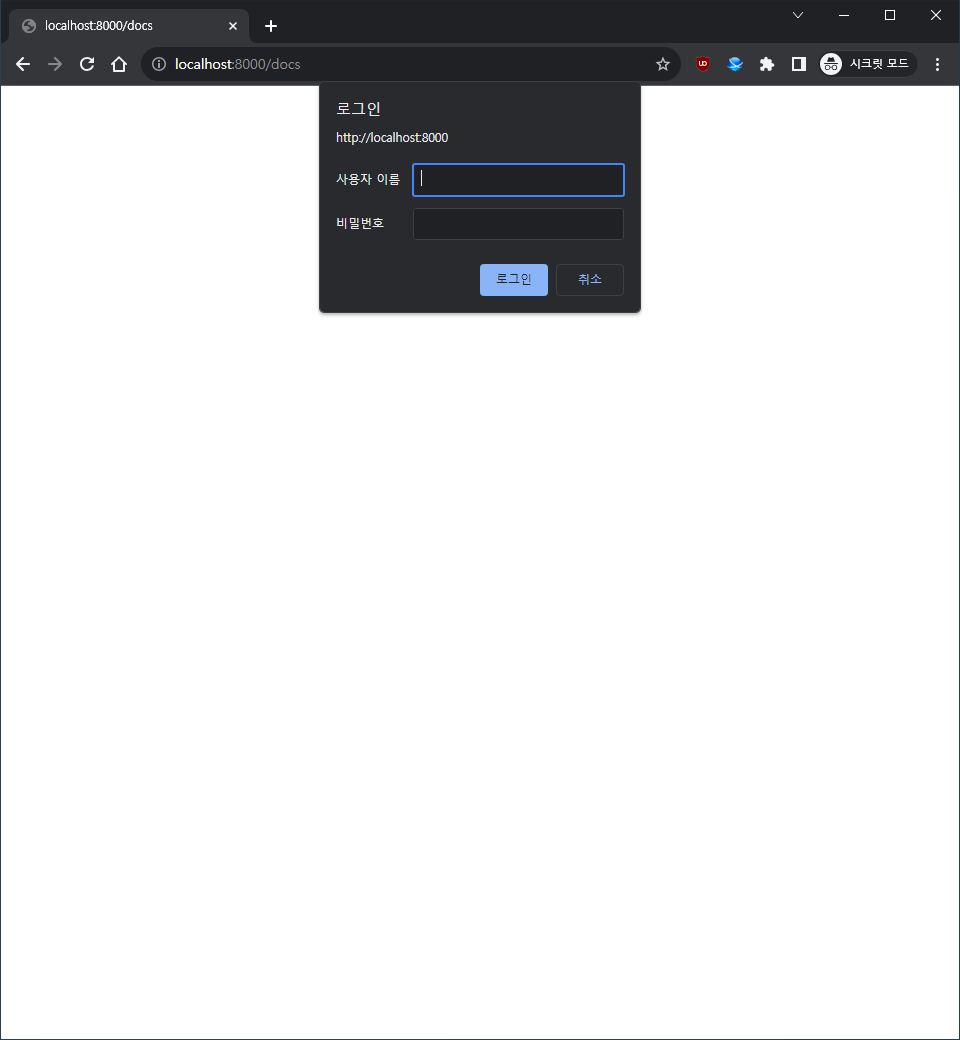
사용자 계정 패스워드 입력 후 평소대로 사용 가능하다.
'공부 > node.js' 카테고리의 다른 글
| NestJS - multer를 사용하여 S3에 데이터 저장 1 (0) | 2023.10.14 |
|---|---|
| NestJS - multer를 이용한 미디어 파일 서비스 (0) | 2023.10.09 |
| NestJS - 회원 가입 API 개발시 패스워드 암호화하기, mongoose virtual field 사용하기 (0) | 2023.10.02 |
| 에러 기록 - export class Cat extends Document... ReferenceError: Document is not defined (0) | 2023.10.02 |
| NestJS - .env (0) | 2023.10.01 |


